
Face cam and gameplay split screen for vertical videos
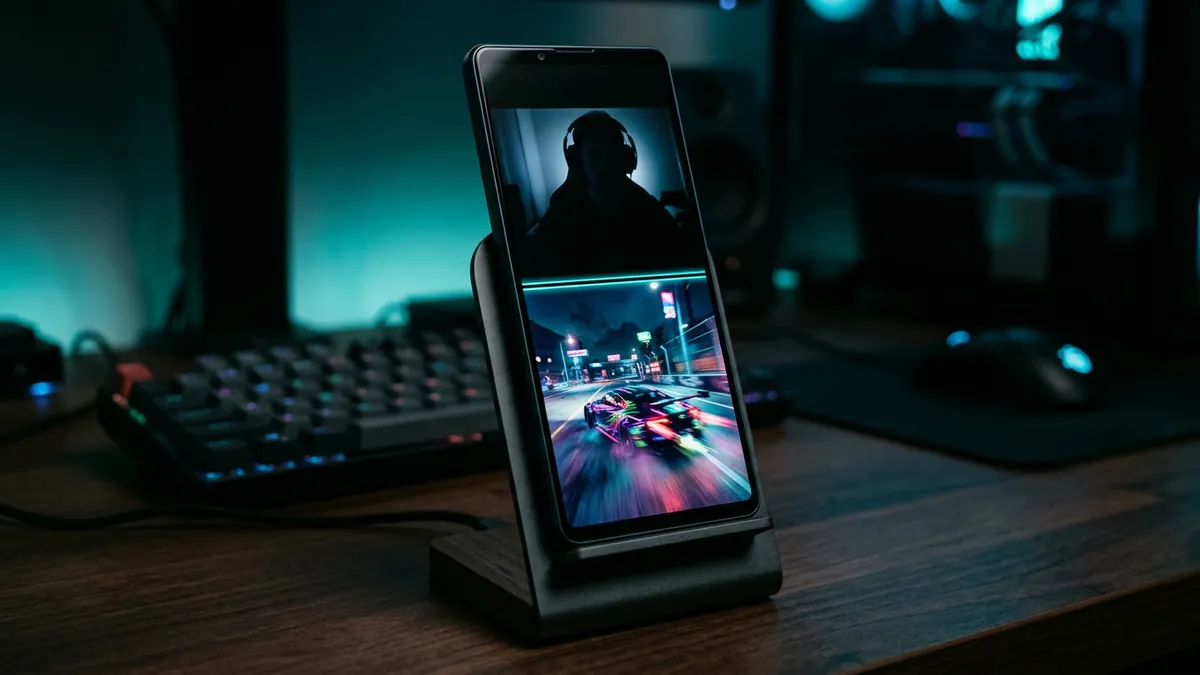
A face cam and gameplay split screen stacks the streamer's camera on top and the game below, inside one 9:16 vertical frame (1080 x 1920 pixels is the usual size). Give the gameplay the larger share, crop the face cam tightly, and keep captions and the action away from the edges where the app's buttons sit.
Why a split screen works on short-form video
Streams are recorded wide, in 16:9, but TikTok, YouTube Shorts and Instagram Reels are watched on a phone held upright. If you post the wide video as it is, it sits as a thin strip in the middle of the screen with black bars above and below. Most of the phone is wasted.
A split screen fixes that. The streamer's face goes in one part of the frame and the game in the other, so both are large enough to see. Viewers get the reaction and the cause of the reaction at the same time, which is usually the whole point of a gaming clip.
The vertical canvas and split sizes
All three big short-form apps are built around vertical 9:16 video. TikTok's own video specifications recommend 9:16 for vertical video, and Instagram's help page on Reel sizes and aspect ratios accepts ratios up to 9:16. YouTube treats square and vertical uploads of up to three minutes as Shorts, as its page on three-minute Shorts explains.
The most common working size is 1080 x 1920 pixels. It is sharp on phones and every app accepts it. Some people export at 720 x 1280 to save space, which is still 9:16, just less detailed.
On a 1080 x 1920 canvas, both pictures are 1080 pixels wide. You only decide how the 1920 pixels of height are shared. Here are the common choices, worked out for a 1920 x 1080 recording:
| Split (face / game) | Face cam area | Gameplay area | Share of the game's width you keep |
|---|---|---|---|
| 50 / 50 | 1080 x 960 | 1080 x 960 | About 63% (the middle 1,215 pixels) |
| 40 / 60 | 1080 x 768 | 1080 x 1152 | About 53% (the middle 1,013 pixels) |
| 35 / 65 | 1080 x 672 | 1080 x 1248 | About 49% (the middle 935 pixels) |
| Full picture, no split | None | 1080 x 1920 | About 32% (the middle 608 pixels) |
The last column is the part people miss. When you fill a tall box with a wide recording, the sides of the game are cut off. Even at 50 / 50 you lose more than a third of the width. That is why the action has to be near the centre, and why the HUD in the corners usually disappears.
A good starting point for most gaming clips is roughly 40 / 60, with the face on top. The face is still large, and the game gets enough height to show what happened. Use 50 / 50 when the reaction is the main event, such as a jump scare. Give the game more room when the play itself is the story.
Face on top is the usual choice. Eyes are drawn to faces, and the bottom of the screen is where the apps put their caption text and buttons, so the game is better at the bottom where small overlaps matter less than they would on a face.
How to make a face cam and gameplay split screen
Any video editor that lets you set a custom canvas, crop and stack layers can do this. The steps are the same idea everywhere, even if the buttons have different names.
- Cut the moment first. Trim the clip to the part you want before you start framing. It is quicker to frame 40 seconds than a two-hour recording. If you need help choosing a length, see the best clip length for TikTok, Shorts and Reels.
- Make a vertical project. Set the canvas or sequence to 1080 x 1920 and the same frame rate as your recording, usually 30 or 60 frames per second.
- Put the clip on two tracks. Place the same clip on two video layers, lined up exactly, so the face and the game stay in sync.
- Build the face cam layer. On the top layer, crop away everything except the face cam. Scale it up until it fills the full 1080 width, then move it to the top of the canvas.
- Build the gameplay layer. On the second layer, scale the game up until it fills the height of the bottom section, then slide it left or right so the action is in the middle. Crop the top edge so it does not show under the face cam.
- Check the seam. Make sure there is no gap or overlap between the two pictures. A thin dark line between them is fine and can look tidy, but a sliver of the wrong picture looks careless.
- Scrub through the whole clip. The face cam does not move, but the game does. Watch the full clip at the new framing to check the key action never leaves the frame.
- Add captions and a title, then export at 1080 x 1920. Our guide to adding captions to gaming clips covers that part.
If you make many clips from the same stream, save the layout. The streamer's face cam is usually in the same place for the whole broadcast, so one good framing can be reused for every clip from that recording.
Framing the face cam
The face cam box on a stream is often small, so you are scaling it up a lot. That makes framing choices more visible.
- Keep the whole face, plus a little space. Include the top of the head and the chin, with some room around them. Cutting through the forehead makes people look squashed.
- Crop out the stream decorations. Webcam borders, alert boxes and channel names often sit around the face cam. Crop inside them so the face is clean.
- Do not stretch it. Scale the width and height together. A face cam pulled wider than it really is looks wrong straight away, even to viewers who could not say why.
- Watch for movement. Streamers lean back, stand up and leave the frame. Check the busiest part of the clip, usually the reaction itself, and frame for that moment rather than the calm start.
- Accept some softness. A small webcam image enlarged to 1080 pixels wide will not be razor sharp. That is normal. Do not zoom in further than you need just to fill space.
Some streams use a green screen or a cut-out of the streamer over the game rather than a box. In that case there is no neat rectangle to crop. Either frame a rectangle around them that includes some of the game behind, or skip the split and use the full picture.
Framing the gameplay
Because the sides are cut off, the gameplay box is a decision about what the viewer needs to see.
- Centre the action. In shooters and third-person games the crosshair or character is usually in the middle, which makes this easy. Put the action near the centre of the gameplay box, not just the centre of the screen.
- Think about the HUD. Health bars, minimaps and kill feeds live in the corners and will usually be cropped away. If the clip only makes sense with one of them, such as a health bar at one hit point, frame wider or give the game more height.
- Keep important text readable. Small in-game text becomes hard to read on a phone. If a line of dialogue or a chat message is the joke, put it in your captions instead of relying on the game's tiny font.
- Do not zoom too far. Zooming in on the game hides context and makes fast camera movement feel even faster. Stay as wide as the box allows unless one detail matters.
A fixed frame works for most clips. If the action moves from one side of the screen to the other, some editors let you animate the gameplay position over time. Move it slowly, or cut to the new position at a natural break. A frame that drifts around constantly is tiring to watch.
Captions, titles and safe areas
Each app draws its own interface over your video: the account name and caption text along the bottom, and buttons like likes and comments down the right side. Anything you put under them is partly hidden. TikTok publishes downloadable safe zone files on its video specifications page that show those areas, and they are worth checking against at least once.
For a split screen, these placements usually work well:
- Captions near the seam. Placing spoken captions just below the line between face and game keeps them in the middle of the screen, close to where the viewer is already looking, and clear of the bottom interface.
- A short title at the top. A few words over the top of the face cam can set up the moment. Keep it off the face itself, and keep it short so it does not cover half the picture.
- Nothing important in the bottom fifth. Treat the very bottom of the frame as busy space. The gameplay can run behind the interface, but captions and key action should not.
Big, bold captions with an outline or shadow read best over moving gameplay. Preview the clip on an actual phone before posting. What looks large on a monitor often looks small in your hand.
When not to use a split screen
A split screen is a tool, not a rule. Use the full picture instead when:
- There is no face cam. Some streamers do not show their face, and some clips come from a camera-off segment. A split with an empty top half is worse than no split.
- The face cam is the whole scene. In talk segments where the camera fills the stream, crop the person straight into the vertical frame instead.
- The game needs the space. A wide cinematic, a huge open-world view or a strategy game with information everywhere may need more height than a split allows.
- The reaction is not part of the moment. If the streamer is calm and the play speaks for itself, a full-height game view can be stronger.
Doing it faster with a clipping tool
Building two layers by hand for every clip gets slow once you make clips regularly. Tools made for clipping can set up the layout for you. In Clipper X, for example, you pick a Split: face and game or Full picture layout, then drag and zoom each picture on the preview, and Use on all clips copies that framing to every clip from the same video. If you leave the split untouched, it looks for a face when it exports and falls back to the full picture if it finds none. The Clipper X guide walks through it.
Common mistakes
- Posting the wide video with black bars. It wastes most of the screen and the action ends up tiny.
- Stretching instead of cropping. Faces and games pulled out of shape look amateur immediately.
- Leaving the webcam frame and alerts in. Crop inside the stream overlay so the face cam looks clean.
- Framing only the first second. The key action happens later. Scrub through and frame for the peak.
- Putting captions at the very bottom. They end up under the app's own text and buttons.
- Splitting a clip with no face cam. Use the full picture instead.
- Forgetting permission. Framing does not change who owns the stream. Only clip content you own or have permission to use, such as a clipping campaign run by that creator. Our beginner's guide to clipping explains how campaigns work.
Frequently asked questions
What size should a face cam and gameplay split screen be?
Use a 9:16 vertical canvas, usually 1080 x 1920 pixels. Both pictures fill the full 1080 width, and you share the 1920 pixels of height between them, for example 768 for the face cam and 1152 for the gameplay.
Should the face cam go on the top or the bottom?
Top is the common choice. Viewers look at faces first, and the bottom of the screen is covered by the app's caption text and buttons, so it is better to have gameplay there than a face.
What is the best split ratio for gaming clips?
Around 40 / 60, with the gameplay larger, suits most clips. Use 50 / 50 when the reaction is the main event, and give the game even more room when the play itself is the story.
Why is the side of the game cut off in my vertical clip?
A wide 16:9 recording does not fit a tall box without cropping. In a 40 / 60 split you keep only about the middle half of the game's width, so keep the action near the centre.
What if the streamer has no face cam?
Use a single full-height picture of the gameplay instead of a split. An empty or nearly empty top half looks worse than no split at all.
Can I make a split screen in a free video editor?
Yes. Any editor that lets you set a 1080 x 1920 canvas, place the same clip on two layers and crop each layer can make a face cam and gameplay split screen.
Keep reading
 How to add captions to gaming clipsHow to add captions to gaming clips: generate a transcript, fix misheard names and game terms, and style bold captions that stay clear over busy gameplay.
 How to clip Twitch streams for TikTokHow to clip Twitch streams for TikTok: get permission, save the footage, find the moment, frame it for 9:16, add captions and post with credit.
 How to clip Kick streamsHow to clip Kick streams with the Clip button or C key, Kick's 10 to 180 second limit and cooldown, and how to turn clips into vertical TikToks and Shorts.