
How to add captions to gaming clips
To add captions to gaming clips, generate a transcript with speech recognition, fix the words it gets wrong, then burn the captions into the video in a bold, outlined font placed away from the app's buttons. Any video editor with auto captions can do it; the part that makes the difference is checking the words and making them readable over busy gameplay.
Why gaming clips need captions
A lot of short videos are watched with the sound off: on a bus, in class, late at night next to someone asleep. Without captions, a clip where the whole joke is something the streamer says is just a person moving their mouth over some gameplay. Most viewers will swipe before they work out what is going on.
Gaming clips have an extra problem. Game audio, music, chat sounds and voice chat all compete with the streamer's voice. Even with the sound on, a shouted line in the middle of a fight can be hard to catch. Captions make sure the key line lands on the first watch.
Captions also help people who are deaf or hard of hearing, and viewers whose first language is not the one being spoken. And big, clear words give the eye something to follow, which helps a clip feel faster and easier to watch.
Burned-in captions or the app's own captions?
There are two kinds of captions, and it is worth knowing the difference before you start.
| Burned-in captions | The app's closed captions | |
|---|---|---|
| What they are | Words drawn into the video picture itself | Text the app shows on top of the video, which viewers can turn on or off |
| Who sees them | Everyone, on every app, every time | Only viewers who have captions turned on |
| Style | Any font, colour, size or animation you like | The app's own plain style |
| Reposting | Travel with the video to TikTok, Shorts and Reels | Must be made again on each platform |
| Fixing mistakes | Fix before export; after that, re-export | Can usually be edited after posting |
The platforms do offer automatic closed captions. Instagram, for example, explains on its help page about closed captions for reels that it uses speech recognition to create them. YouTube's page on automatic captioning warns that background noise, accents and mispronunciations can make automatic captions get words wrong, which describes most gaming audio quite well.
For clips, burned-in captions are the usual choice. They are always visible, they look the way you want, and the same file works on every app. Turning on the app's closed captions as well does no harm, but do not rely on them alone.
How to add captions to gaming clips, step by step
The steps are the same in almost every editor that has an auto captions feature. Do them in this order, because each one depends on the one before.
- Trim the clip first. Set the final start and end before making captions. If you change the length later, you may end up with missing or extra words at the edges. Not sure how long it should be? See the best clip length for TikTok, Shorts and Reels.
- Frame it as vertical. Decide the layout (for example a face cam on top and gameplay below) before placing captions, so you know where the free space is. Our guide to the face cam and gameplay split screen explains the options.
- Generate the transcript. Use your editor's auto captions or speech-to-text feature. It listens to the audio and writes out the words with their timing.
- Read every word. Play the clip and follow the captions. Fix wrong words, names and game terms (more on this below).
- Choose a style. Pick a bold font, a thick outline and a size that is easy to read on a phone.
- Place the captions. Keep them away from the edges and away from the face and the main action.
- Check on a phone. Export a test, send it to your phone and watch it full screen. Things that look fine on a big monitor can be too small or hidden behind buttons on a phone.
- Export with the captions burned in. Make sure the export setting includes the captions in the picture, not as a separate file.
Fixing the words speech recognition gets wrong
Automatic transcripts are a starting point, not a finished job. They are usually good with clear, normal speech and much weaker with the things gaming clips are full of.
What usually goes wrong
- Names. Streamer names, teammates and usernames are often turned into ordinary words that sound similar.
- Game words. Item names, abilities, places on a map and slang are often misheard.
- Shouting and laughing. Screams, laughter and talking over each other confuse speech recognition.
- Game audio. Gunfire, music and sound effects can be heard as words, or can hide real ones.
- Other people's voices. Voice chat and text-to-speech donations can get mixed into the streamer's lines.
How to fix them quickly
- Watch the clip once all the way through with captions on and note every mistake.
- Fix names and game terms first, since they repeat. If your editor has find and replace, use it, then check each change, because it may also change parts of longer words.
- Delete words that were not really said, such as noise heard as a word.
- Add any important word that was missed, especially in the key line of the clip.
- Watch once more. The key line, the one the clip is about, must be perfect.
Swearing is worth a thought too. If the streamer swears, the rules of the platform and of any clipping campaign you are working for still apply. Some campaigns ask for certain words to be removed or hidden; check the brief.
Making captions readable over gameplay
Game footage is one of the hardest backgrounds for text. Bright explosions, white snow, busy menus and fast camera moves can all swallow plain text. These habits keep words readable.
Use a bold, simple font
Thin fonts disappear on a phone screen. Heavy, condensed or rounded display fonts are easier to read at a glance. Pick one font and stick to it for a channel, so your clips look like they belong together.
Always use an outline
A thick dark outline (often called a stroke) around light text is the single most useful setting. It keeps the words readable whether the background is bright or dark. A soft drop shadow helps too. On very busy scenes, make the outline thicker rather than the text bigger.
Make it big enough, but not huge
Captions should be readable without squinting on a phone held at arm's length. But if they cover half the screen, they block the gameplay people came to see. Test on a real phone and adjust.
Keep them clear of the app's buttons
TikTok, Shorts and Reels all put buttons, the username and the post text over the video, mostly along the right side and the bottom. Captions placed right at the bottom edge are likely to be covered. Placing them a little below the middle of the screen, away from the right edge, is a common choice.
Do not cover the important things
Keep captions off the streamer's face and off the part of the game where the action happens. In a split-screen clip, the line between the face cam and the gameplay is often a good place, since it covers nothing important.
Show a few words at a time
Long sentences on screen are hard to read in the time they are shown. One to a few words at a time is easier to follow on a phone, and it matches the fast pace of short clips.
Timing, word-by-word captions and animation
Captions that appear too early give away the punchline. Captions that appear too late make the viewer feel behind. Good timing means each word shows up as it is said.
Many editors now show captions word by word, with each word appearing or lighting up as it is spoken. This works well for gaming clips because the energy of the voice and the words match. If your editor lets you drag words on a timeline, nudge any that feel early or late, especially around the key line.
Animation can add energy: words that pop in, bounce or shake on a big moment. Use it with care. A strong animation on every word gets tiring, and it can make the words harder to read. A calmer style for normal talk and a bigger effect for the payoff often works better than maximum effects everywhere.
Colour can help too. Many clippers highlight one word per line, such as a name or the funniest word, in a second colour. Keep your colours consistent from clip to clip.
Doing it faster with a clipping tool
Any video editor with auto captions can do everything above. If you make a lot of clips, a tool built for stream clips can save time on each step.
Clipper X, for example, makes subtitles on your own PC, one clip at a time, with speech recognition set up for English. On the captions step you press Generate subtitles, then click any word to fix its text or timing, delete or add words, and use find and replace for repeated mistakes. On the style step you can start from one of 9 caption presets, choose an animation (Pop, Bounce, Slam, Slide or Glow), and set the font, size, colours, outline thickness and shadow.
Its preview can also show your caption style over sample pictures, with a hint about whether the text reads well there. The Clipper X guide walks through every step.
Quick checklist
- The clip is trimmed and framed before captions are made.
- Every word has been read and checked, especially names, game terms and the key line.
- Noise heard as words has been removed.
- The font is bold, with a thick outline and ideally a soft shadow.
- Captions are big enough to read on a phone, but do not hide the gameplay.
- Captions sit away from the bottom edge and the right side where the app's buttons are.
- Captions do not cover the streamer's face or the main action.
- Only a few words show at once, and they appear as they are said.
- Animation is used with care, not on every word at full strength.
- A test export has been watched full screen on a phone.
New to clipping? The beginner's guide to clipping covers the whole process, from finding moments to posting. And remember to only clip content you own or have permission to use.
Frequently asked questions
Should I use TikTok's auto captions or burn captions into the video?
For clips, burned-in captions are usually better. Everyone sees them, you control how they look, and the same video works on TikTok, Shorts and Reels. You can still turn on the app's own captions as an extra.
Why are my automatic captions so wrong on gaming clips?
Game audio, music, shouting, laughter and voice chat all make speech harder to recognise, and names and game terms are often misheard. Always read the transcript and fix it before you export.
What is the best font for gaming captions?
There is no single best font. Choose a bold, heavy font that is easy to read at a glance, add a thick dark outline, and use the same font across your clips so they look consistent.
Where should captions go on a vertical video?
Away from the bottom edge and the right side, where the app's buttons and post text sit, and off the streamer's face and the main action. Slightly below the middle of the screen, or on the line between a face cam and gameplay, are common spots.
How many words should be on screen at once?
Fewer than you might think. One to a few words at a time is easiest to read on a phone and suits the fast pace of short clips.
Do captions get more views?
Captions do not guarantee views, and most clips get few views whatever you do. They make a clip understandable with the sound off and easier to follow, which gives a good moment a fairer chance.
Keep reading
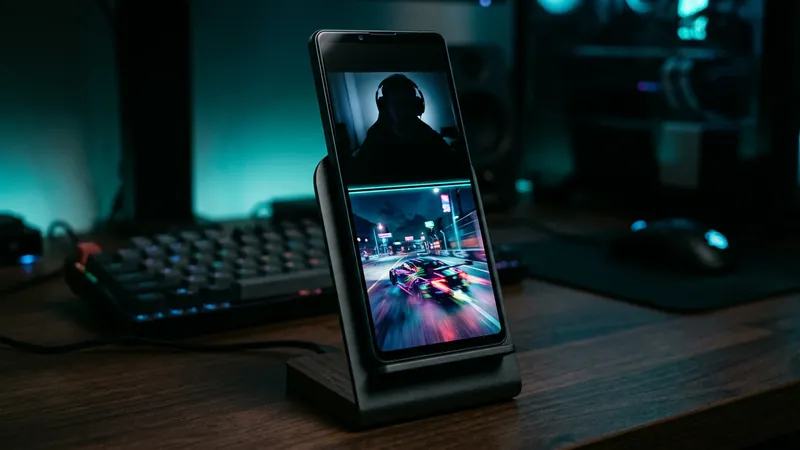 Face cam and gameplay split screen for vertical videosHow to stack a face cam over gameplay in a 9:16 vertical clip: exact split sizes for 1080 x 1920, framing tips, caption placement and common mistakes.
 Best clip length for TikTok, YouTube Shorts and ReelsThe best clip length for TikTok, YouTube Shorts and Reels, with each platform's current limits and a simple way to trim gaming clips to the right length.
 How to clip Twitch streams for TikTokHow to clip Twitch streams for TikTok: get permission, save the footage, find the moment, frame it for 9:16, add captions and post with credit.